Your Washing Machine’s Hidden Hygiene Haven
Just like a favorite outfit that needs a refresh, your trusty Electrolux front load washer deserves some TLC, especially when it comes to maintaining its rubber seal. This critical component ensures a watertight seal during each wash cycle, keeping leaks at bay and safeguarding your laundry room floor. However, dirt, detergent residue, and mold spores can accumulate within the seal’s nooks and crannies, potentially compromising its effectiveness and even causing unpleasant odors. Fret not, intrepid cleaner! With a touch of patience and the right techniques, you can restore your washer seal to its pristine glory, ensuring a fresh and spotless laundry experience.

Image: www.beko.co.uk
Unveiling the Mystery of Electrolux Front Load Washer Rubber Seal
Nestled within the washer’s door, the rubber seal plays a crucial role in preventing water from seeping out during operation. Its flexible nature allows it to conform snugly around the outside of the washer drum, creating a watertight seal. Maintaining the seal’s cleanliness is essential for optimal performance and prolonging its lifespan. A well-cared-for seal will ensure your washer operates efficiently, saving you time, energy, and those frustrating laundry mishaps.
The Art of Cleaning: A Step-by-Step Guide
-
Gather your cleaning arsenal: Arm yourself with an old toothbrush, a soft cloth or sponge, and a cleaning solution made from equal parts white vinegar and warm water.
-
Unplug and de-energize: For safety’s sake, always unplug the washer before beginning any cleaning or maintenance tasks.
-
Open the washer door wide: Allow ample space to access the rubber seal.
-
Remove loose debris: Use the old toothbrush to gently remove any visible dirt, lint, or hair from the seal’s surface.
-
Apply the cleaning solution: Dip the soft cloth or sponge into the vinegar solution and thoroughly wipe down the rubber seal, ensuring all surfaces are evenly covered.
-
Let it dwell: Allow the vinegar solution to sit on the seal for 10-15 minutes. This dwell time gives the vinegar time to work its magic, dissolving and lifting away any stubborn residue.
-
Scrub gently: Using the toothbrush, gently scrub the rubber seal to dislodge any loosened gunk or mold spores. Pay attention to the folds and crevices where dirt tends to accumulate.
-
Rinse thoroughly: Use a clean damp cloth to wipe away the vinegar solution and any dislodged residue.
-
Dry the seal: Use a dry cloth or paper towels to thoroughly dry the rubber seal. Leaving it damp can create a breeding ground for mold and mildew.
The Power of Prevention: Tips for a Sparkling Seal
-
Regular cleaning: Make it a habit to clean the rubber seal after every 20-30 wash cycles or as needed. This regular maintenance will prevent buildup and keep your washer running smoothly.
-
Bleach solution: For tougher stains or mildew, you can use a diluted bleach solution (1:10 ratio of bleach to water). Apply the solution to the affected area, let it sit for 15 minutes, then rinse thoroughly.
-
Baking soda wonders: Baking soda is a natural deodorizer and can help absorb moisture. Sprinkle baking soda around the rubber seal after cleaning to keep it fresh and dry.
-
Leave the door open: After each wash cycle, leave the washer door open to allow air to circulate and prevent moisture buildup.
-
Avoid fabric softener: Fabric softener can leave behind a residue that can accumulate on the rubber seal. Consider using dryer sheets instead, which are less likely to cause buildup.
-
Service reminders: Set reminders on your phone or calendar to clean the rubber seal regularly. Consistency is key to maintaining a sparkling seal.
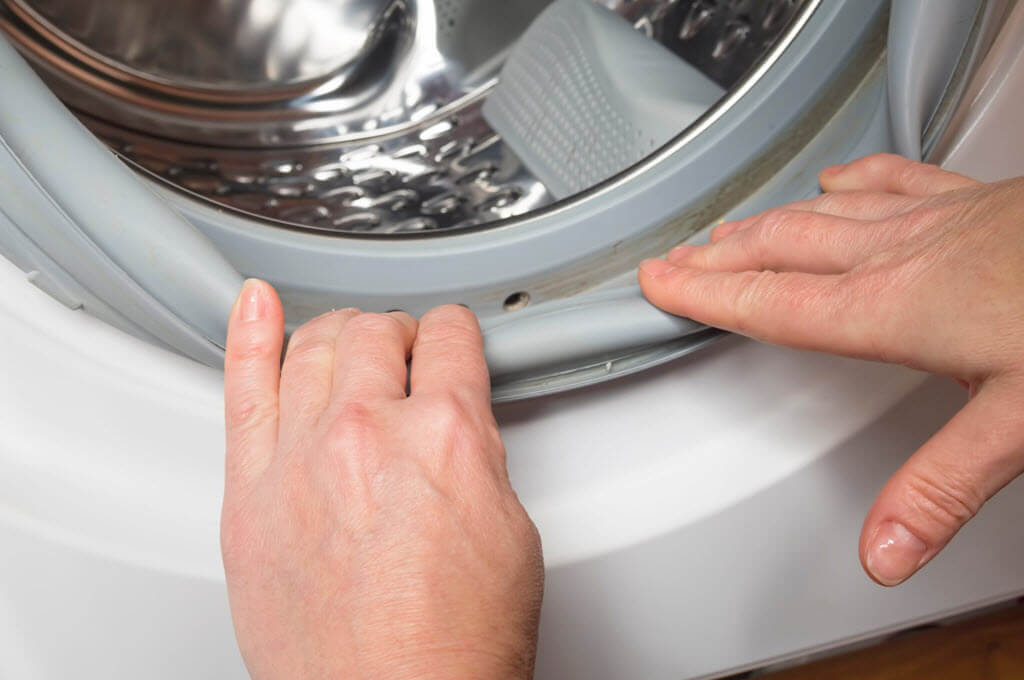
Image: capitalappliancerepair.ca
Frequently Asked Questions (FAQs): Your Concerns, Answered
Q: How often should I clean the rubber seal on my Electrolux front load washer?
A: It’s recommended to clean the rubber seal after every 20-30 wash cycles or as needed.
Q: What’s the best cleaning solution for the rubber seal?
A: A solution made from white vinegar and warm water (equal parts) is effective in removing buildup without damaging the seal.
Q: Can I use bleach to clean the rubber seal?
A: Yes, you can use a diluted bleach solution (1:10 ratio of bleach to water) for tougher stains or mildew. Rinse thoroughly after application.
Q: Why is it important to keep the rubber seal clean?
A: A clean rubber seal prevents water leaks, ensures optimal washer performance, and prolongs the seal’s lifespan.
Q: What’s the best way to dry the rubber seal after cleaning?
A: Use a clean dry cloth or paper towels to thoroughly dry the seal. Leaving it damp can create a breeding ground for mold and mildew.
How To Clean Electrolux Front Load Washer Rubber Seal
Conclusion: A Spotless Journey to Laundry Bliss
In the realm of laundry, a clean Electrolux front load washer rubber seal reigns supreme. By embracing the simple yet effective cleaning techniques outlined in this guide, you can restore and maintain the seal’s pristine condition, ensuring a spotless and efficient laundry experience for years to come. Remember, a well-maintained washer seal not only safeguards your floors but also contributes to the longevity and optimal performance of your trusty washing machine.
Tell us, dear readers, do you find the topic of Electrolux front load washer rubber seal cleaning fascinating? Share your thoughts and experiences below, and let’s embark on a journey of sparkling seals and laundry triumphs. Together, we’ll keep our washers spinning smoothly and our laundry sparkling fresh!